For those who like to download music online, this is also a good way to have a backup and have all your music offline in one place. So if you want to know how to record music on a Flash Drive, just check out our guide down below!
How to save music on Flash Drive
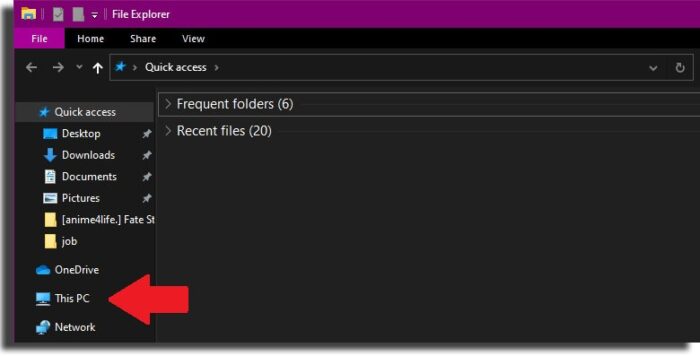
For those who already have many songs on the PC, the process is much simpler. But if you don’t have all the songs you want yet, there are many sites to download free music out there. You can use Soundcloud, Last.fm or even Free Music Archive for that. All of these are sites where you can download music online and totally free if you are looking for something like this. We have an specific guide on this exact process aimed at Soundcloud users right here, in case you are interested. Well, with the songs already downloaded on your PC, insert the Flash Drive on your computer and open the Windows file explorer. You must choose the “This PC” option or whatever is your equivalent.
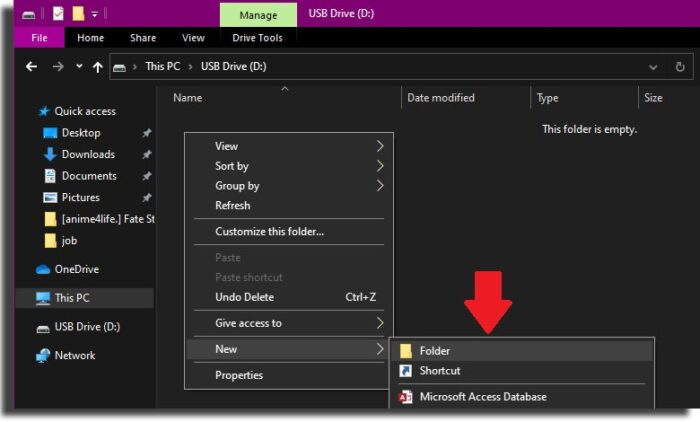
With that done, you will see your PC’s HD or SSD and a smaller storage device, and that would be your Flash Drive. You can recognize it even better knowing how much space it has, as it will be visible in the bar right below it. Click on the icon to proceed.
If you don’t already have a folder just for music on your Flash Drive, it’s a good idea to create it now. To do this, right-click on the blank space on the screen and select “New”. Then click on “Folder”.
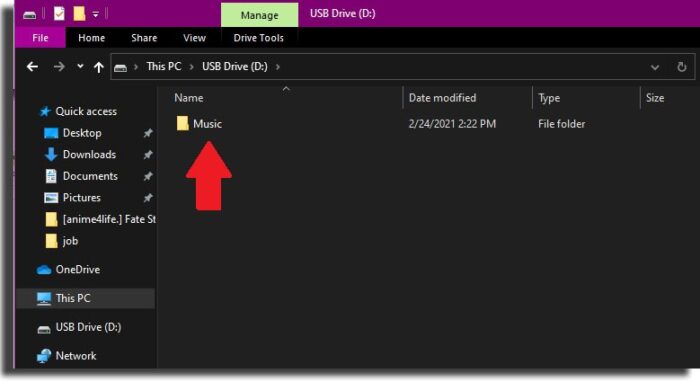
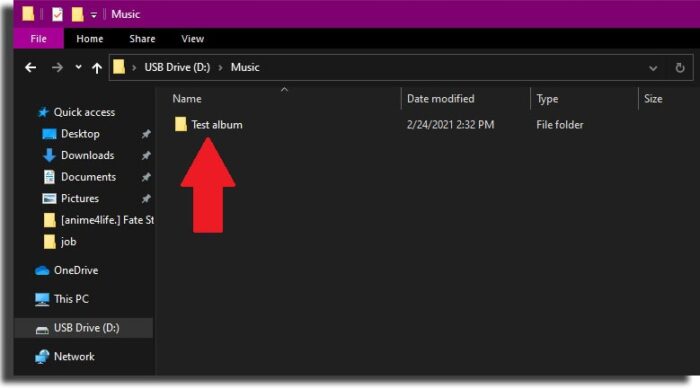
This will create a new folder on your Flash Drive. You can name it whatever you like, but for this tutorial we gave it the simple name “Music”. Something very simple to identify, easily conveying what it is all about.
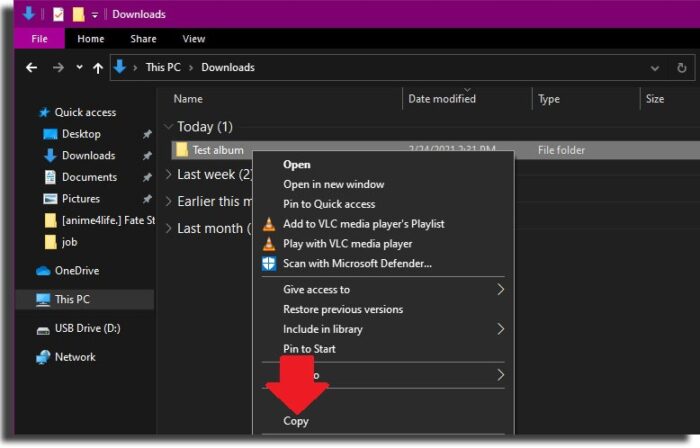
After you are done with that, go to your PC folder with the songs you want to transfer to the Flash Drive. If you have just downloaded them, they are likely to be in the “Downloads” folder. Use the right mouse button to click on the songs and select the option “Copy”. You can also just select the file and use the shortcut “CTRL” and “C” to make a copy.
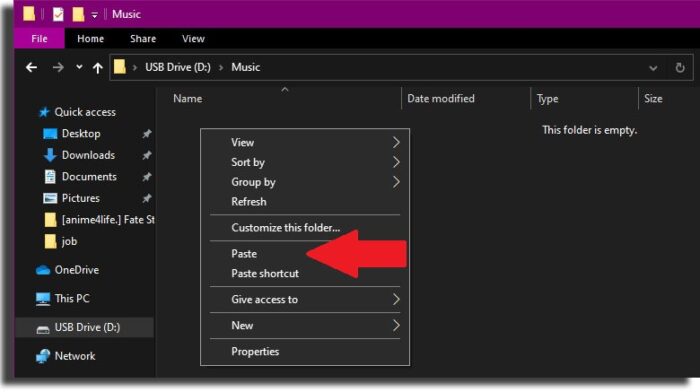
Go back to the Flash Drive music folder, right-click on the blank space and select the “Paste” option. Alternatively, use the shortcut “CTRL” and “V” to paste the files into the folder.
Now just wait for the files to be transferred to the Flash Drive. Do not remove it or perform another copy action until this process is complete, as that can result in corrupted files or compromising the integrity of your Flash Drive.
The time it will take will vary depending on the size and amount of files transferred. So, if you only transfer a few short songs, it shouldn’t take too long. And this is how you can save music on Flash Drive in minutes. Just repeat the process whenever you need to put new music on your device and you are golden!.
Did you like these tips?
So, did you learn how to save music on Flash Drive? That really helps with keeping your favorite albums with at all times, so you can even listen to them while driving. If this helped you, leave us a comment down below telling us all about your music taste and how much you are enjoying this method of keeping your stuff with you and bringing them anywhere! If music really is your thing, then perhaps you’d be interested in these apps to download music on iOS devices, or maybe you’ll like these websites to download music!